Showing posts with label Food - Main Dish. Show all posts

Monday, July 18, 2011

Back to School with Goodbyn Lunchbox

As I have Bento on the brain at the moment, I thought I'd post about "Goodbyn".  Goodbyn is one of the best earth-friendly lunchboxes around.  I personally find it mom, child and budget friendly too.  I consider it the "Americanized Bento" of the bunch. I first purchased this last year when my son enter Kindergarten, but I would have done well to pay attention to the 'suggested age' which was 6 years and up.  Although I tried to teach my 5 year old how to 'click' the lid shut -- I just didn't feel comfortable that he would be able to do it on his own.  But as he turned 6 a few months ago, and his motor-skills naturally improved -- It's been very simple for him to use.

No plastic bags or juice boxes needed.  Since it is dishwasher safe (although I prefer to wash it by hand) it's a breeze to clean.  FDA Approved - BPAs, Phthalates & Lead Free and 100% recyclable.  It comes with over 100 stickers for personalization.  It's available in two sizes and many color options.  Goodbyn is available from My Toy Box, where I find their prices very competitive, especially when on sale.


You may also enjoy:  "Back to School with Crocodile Creek"

I "Like" Mondays with 'Anna the Red's Bento & Plush Factory'

When I encourage my friends or acquaintances to do what they love and love what they do, this is a great place to use as an example.  'Anna' was born in Japan and moved to the U.S. in 1994.  This former art student loves to use her talent towards the most fantastic bento box meals (as well as plush art).  What child wouldn't love opening up his lunch to reveal such a playful meal?  This is nutrition well disguised.  To see her amazing food art, "Like" her facebook page or blog.

As we begin to think of back to school, give thought to a bento box this year.  I used an egg mold and some other clever side accompaniments last year and the result was a group of lunch ladies (as well as many students) finding much entertainment with each bite my little boy took.  Anna's site is well designed with many pictures and 'how-to' lessons.  She has given me much inspiration for a new school year of lovingly prepared and healthy meals.

For many choices in Bento Boxes and tools you may want to check out: 

Sunday, April 10, 2011

Serenity Sauce with Snow Peas


I call this Serenity Sauce, because it is my Asian version of comfort food.  The strong, powerful ginger taste, is tamed by simple celery slices -- together they blend into a flavor that puts me at peace.  This is an easy stir fry that you'll want to make often. ( I'm finding it difficult to measure ingredients...quite frankly, in our home, I often just "make do".  So if I say add 3 celery stalks and you only have 2-- don't worry about it ;-) ...The day I took this picture was the day our grocer happened to be out of snow peas.  I just bought another small tender pea pod they had available -- and made do.  My recipes will always give you the ideal amounts and types though.

You will need:
2 Tbls vegetable oil
Prepare ingredients beforehand
1 white onion cut in medium chunks
 3 large cloves garlic, finely chopped
1 Tbls fresh ginger, finely chopped
1 cup fresh celery, sliced diagonally (about 3 good stalks)
*1 cup fresh sliced mushrooms
*1 small handful Chinese snow peas
*1-5 ounce can water chestnuts (sliced or diced version)
*3 boneless, skinless chicken breasts, thinly sliced
1-1/2 cups chicken stock
2 teaspoons corn starch, gradually mixed with 1/2 cup water
Salt and Pepper to taste
Soy Sauce to taste
* green onion for garnish and extra flavor
(Serve with steamed jasmine rice)

1)  Always start your rice first, so it's cooking and ready by the time your stir fry is complete.  
2)  Heat oil on medium high in non-stick wok or frying pan.  Add onion and cook until soft, about 5 minutes.
3)  Stir in garlic and ginger and cook with the onion another 5 minutes.   
4)  Stir in celery slices, (reserving 2 tbls) and cook an additional 5 minutes.  At this point the house will be so aromatic, that your husband will suddenly appear at your side saying, "You are the BEST cook in the world."  You will then give him a pleasant smile and not mind it when he dips a fork into your vegetable mixture, depositing the large bite into his mouth.  

Just as he leaves the room, children will begin appearing -- asking politely when dinner will be ready.... tell them 20 more minutes.

5)  Stir in mushrooms, add large pinch of salt and sprinkle some pepper in as well.  After a few minutes, remove this mixture to your serving dish.  
6)  Keep the pan hot and stir in your chicken slices, trying to brown gently and seal in the juices.  cover for 5 minutes.
7)  Add chicken stock and a LITTLE soy sauce --but PLEASE don't add too much or you will drown out the beautiful ginger flavor.  So just add a teaspoon at a time-- you can always add more later.  Stir and cover again for 10 minutes.
8)  Return vegetables to the pan with the chicken along with water chestnuts.  Add the cornstarch mixture -- stir and let thicken. 
 9)  **Now add your snow peas and the 2 tbls celery and cover for a few more minutes.
10)  Voila!  Return to your serving dish (or serve from the pan if you like) over hot steamed rice.  Garnish with green onion or chive if desired.  A side of fresh orange slices are nice too.  

*  Optional Ingredients (If you don't like my veggies, you can choose your own.  You can also make this with other meats, shrimp or tofu.  I sometimes make it with JUST veggies.  

**  This is so the vegetables are a nice bright green when serving.  Try to remove from heat and not over cook.  


Garlic Peeling Tip:  Lay the flat edge of your knife over your clove of garlic and give it a nice bang with your free hand.  The skin will come off nicely now.


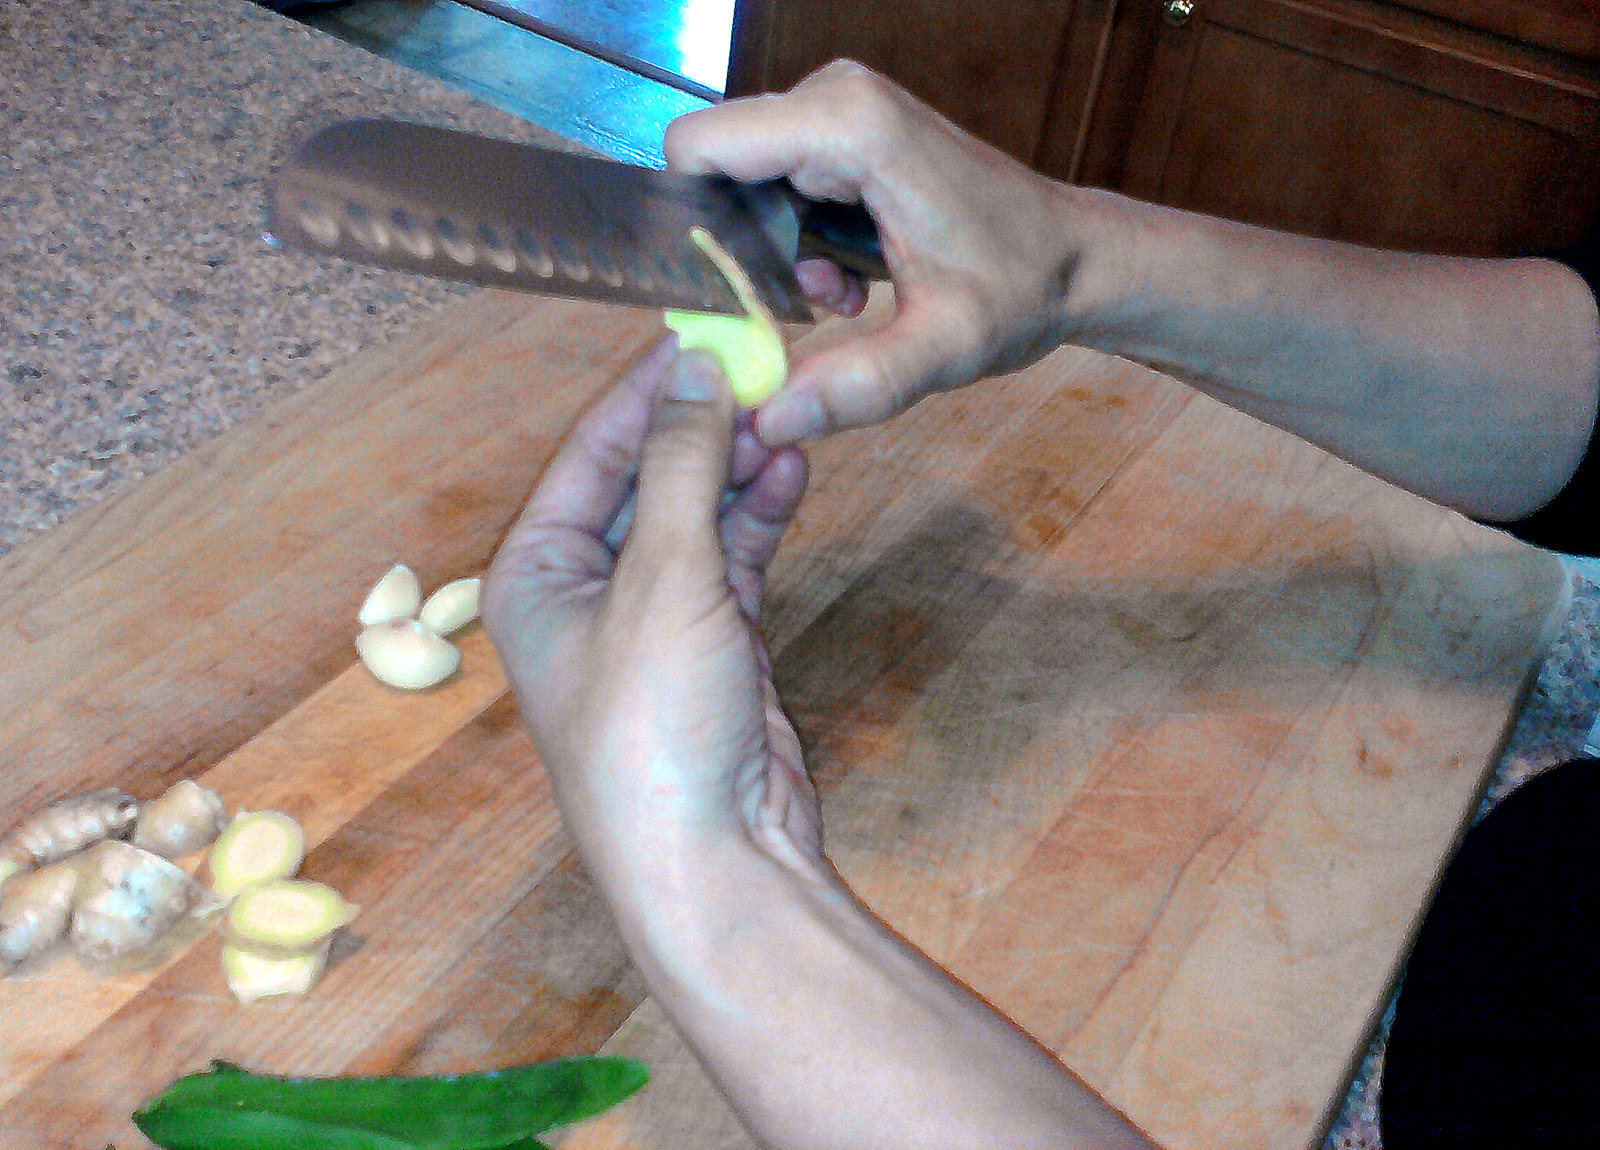
Ginger Peeling Tip:  Slice your ginger into rounds first, then take your knife around the edge to easily peel.


I like to chop garlic and ginger together. 


Monday, October 4, 2010

Crispy Baked Macaroni Cups from Belleicious Kids

Crispy Baked Macaroni Cups from Belleicious Kids

Ritz Crackers blended with Mac & Cheese in a muffin cup....what could be better then that?  There's a touch of fall in the air, and with that change comes a familiar favorite this month that I know your boys will love.

Funny how things come to you when your desires are calling.  Jessica Maher is a fellow 'Southern Momma' and enjoys cooking soooo much that she now has 2 blogs where she shares her wonderful recipes.  When Jessica sent me a message announcing her new recipes/blog for kids meals, I was thrilled to be able to pass this onto you.


You can find this recipe with more to come at Belleicious Kids.  I'm looking forward to trying this one -- all my boys absolutely love mac & cheese.  Thanks Jessica!  

Friday, April 30, 2010

Supper Bell! Thai Basil Chicken


After making my Jasmine Fried Rice recipe several times, my sweet and friendly neighbor has now requested (very strongly)  that my Thai Basil Chicken Recipe be posted.   I made this last Sunday -- just to get the ingredients perfected.  One of our teenage sons came over and hugged me when he discovered I was making his favorite dish.  Then harassed me to 'hurry up' as the wonderful smell of basil flowed throughout our home.  Here it is neighbor and Just for Jack friends!


You will need:

2 tablespoons vegetable oil
1/2 onion, finely chopped
2 cloves garlic, finely chopped
Always have ingredients ready before you begin
*1- 3 teaspoons hot peppers of your choice, sliced into thin strips (This is optional)
Large handful of fresh basil, Thai variety preferred
1 lb ground chicken or turkey
3 tablespoons maple syrup or 2 tablespoon honey
1/2 cup chicken stock
1-1/2 tablespoons fish sauce (do not fear the fish sauce)
3-4 tablespoons Japanese soysauce, (Kikkoman is fine)
1 level Tablespoon cornstarch
1 lime (optional)

1)  As this is best over fresh, steamed rice, get that started and going, so it is ready when your dish is complete.

2)  In a skillet, add vegetable oil and turn to medium.
3)  Add diced onion and garlic and saute until onions have a glossy transparency to them.
4)  Tear up 2/3 of your fresh basil and add it to the sauteed onion/garlic.
5)  If you like things spicy, then add 2/3 of your fresh, hot peppers now as well.
6)  Stir for a few minutes, then add your ground chicken or turkey and turn your heat to medium high.
7)  Stir often as the meat is browning, and cooking through.
8)  While meat is browning, make your sauce:

In a bowl, combine your syrup (or honey) with chicken stock and fish sauce and stir well.

In a separate small bowl, combine soy sauce and cornstarch until completely mixed, then add to honey mixture.

9) When meat has cooked through, give your sauce one more good stir and then add it to your skillet.  As it starts to bubble, turn the heat to medium low and stir frequently for a few more minutes while sauce thickens.

10) Your meal is ready now.  You can garnish each serving with a few more basil leaves, a lime wedge and hot peppers.  Serve over fresh, steamed rice.

A word on Fish Sauce:

Do Not Fear
For years I wondered why my meals would not taste as good as some of my father's restaurant dishes.  It was then I learned the distinct taste that fish sauce lends to Asian meals.  Fish sauce is normally used in small quantities and is needed to bring that 'just right' flavor.


A word on Hot Peppers:

Do not make the same mistake I did when chopping and removing seeds from your peppers.  Always wear gloves when you do this.  Removing seeds will make your dish 'less' spicy -- so if you like it hot, you may want to add it with the seeds.

* I sometimes just use a couple drops of hot chili oil or dried red peppers as an alternative to the fresh peppers.

A word on starch:

If you like to roam around Asian food markets, you can find all types of interesting ingredients.  For variety I sometimes use sweet potato or tapioca starch.  I find them very inexpensive too.

Monday, April 26, 2010

What's In Your Bento? - Bento Box Review


Many, many years ago, schools did not serve lunches as they do today.  During this time, children in Japan would bring their meals to school in a bento box.  A bento box, is basically a Japanese lunch box.  It normally consists of 4 parts rice, 3 parts meat, 2 vegetables and a side of something pickled.  My first experience with bento left me almost too afraid to eat the food -- it looked so lovingly prepared.  Perhaps that is why I love Bento Boxes so much. 

Preparing a meal, is an expression of love with me.  My husband has learned to very carefully tell me when he doesn't like something I've cooked.  Though I do not have the time to prepare as many elaborate pieces as others might, our son still enjoys the little Americanized ways with his bento.  I've found that cutting vegetables into shapes entices children to try them.  I have a little neighbor boy who at first turned his nose up to starfruit.  After I cut it into its natural occurring star shape and explained that it tasted like an apple, he tried it...and loved it.

You can purchase many kinds of different shaped cutters and accessories for your box if you wish, or you can be as simple as you like.  I have a lot of different sized cookie cutters, and I just get resourceful with them.  But you can buy actual vegetable cutters from Asian shops.  Bento boxes come in dozens of options; dishwasher safe, microwaveable, 1-tier, 2-tier, etc.  I love that I never have to use plastic bags.  They are very fun for children and I think the popularity with bento is quickly growing.


If you happen to have an Asian market of some kind near you, take a look around.  You will probably be pleasantly surprised at what you find there.  I found these perfect sized bowls -- small and medium.  I loved them so much that I had to go back and get a second set of each.  (I also found my son's bento box at the Asian market.)

see:  Back to School with Goodbyn Lunchbox (Americanized Bento)
see:  Japanese Egg Molds


Friday, April 9, 2010

Chimene's Panang


I was going to be frugal tonight and boil the chicken carcass in the fridge to make chicken with rice soup, but as our Georgian weather often does, it has turned from cool to hot with no real warning -- and soup just wasn't going to do it for us.  We still had chicken and rice...just in another form.  

When Matthew told me my panang tasted better then his favorite Thai restaurants', I knew I had finally perfected the recipe. Here it is for you now.


You will need:


3 skinless, boneless chicken breasts
1-4oz jar Thai Kitchen red curry paste
1 15 oz can lite coconut milk
1/3 cup creamy peanut butter in it's most natural form
handful demanera sugar
1-1/2 tablespoons fish sauce
1 jalopeno or Korean pepper*
handful of fresh basil
2-3 tablespoons sour cream
12 fresh green beans

1/2 sweet yellow bell pepper or medley of small colorful bell peppers
fresh chives
red pepper flakes
1)  remove all fat from chicken breast.  Slice down the center of each breast, then thinly slice each half into medium sized pieces.  Set aside. ( Taking the time to thinly slice your chicken will be the difference between a good meal and a 'great' meal. Invest in a good, sharp knife!)


2)  Pour the coconut milk into a large, non-stick skillet and set to medium low.  Slowly and carefully stir in the smoothly ground peanut butter until well blended.  


3) Add the fish sauce and handful of sugar and stir until sugar is dissolved.


4)  seed and slice hot peppers and add to red sauce.  Tear the basil into pieces, adding most of it in, leaving smaller leaves to garnish with later.


5)  Add chicken and gently stir until it is all submersed in the panang sauce.  C0ver and keep on medium low until chicken is white and cooked through  (20-30 min), stirring occasionally, then turn your heat down a bit.


6)  Add green beans and sweet bells then cover again for 5-10 minutes, letting the beans get bright green, but remaining on the crispy fresh side.  Now gently stir in your sour cream.


Serve over fresh steamed basmatri or jasmine rice.  Garnish with fresh chives, additional basil and red pepper flakes.

*make sure you use gloves when slicing and seeding peppers.  If you'd rather not bother, then use a couple drops of hot chili oil.
Serves 4